TL;DR
- Multi-step forms improve user experience by breaking lengthy forms into manageable sections, reducing cognitive load and increasing completion rates
- Building a multi-step form requires HTML structure (form container, steps, navigation buttons), CSS styling (hiding/showing steps), and JavaScript for navigation logic
- The implementation includes creating step containers, styling them with CSS, and adding JavaScript to handle step navigation and form submission
- Enhanced user experience features include progress indicators, animations, real-time validations, and conditional logic
- Additional advanced features can include auto-saving data, keyboard navigation, and multi-language support.
Learning how to create multi-step forms is a valuable skill for web developers, as it can significantly improve user experience by making lengthy forms less overwhelming. In this article, we’ll explore how to create multi-step forms with Vanilla JavaScript and CSS and learn best practices for implementing forms in HTML and CSS effectively. By the end of this article, you’ll be equipped to build an interactive and visually appealing form that enhances user engagement.
What are Multi-Step Forms ?
Multi-step forms are a type of user interface that breaks a single, lengthy form into smaller, manageable sections or steps. Instead of presenting all the fields at once, the form is divided into multiple steps that users navigate through sequentially using Next and Previous buttons. This approach reduces the cognitive load on users, making the form less intimidating and easier to complete.

A well-structured multi-step form is important for enabling usability and functionality. The form’s structure can be broken down into the following key components.
- Form Container
- The form itself is enclosed in a
<form>element in HTML. This acts as the main wrapper for all steps of the form.
- The form itself is enclosed in a
- Steps (Sections)
- Each step of the form is represented by a container, usually a
<div>element, with fields relevant to that step. These steps are styled to display only one at a time, while others remain hidden.
- Each step of the form is represented by a container, usually a
- Navigation Buttons
- Each step contains Next and Previous buttons for navigation. These buttons are important for moving forward or backward between steps.
- Final Step and Submit Button
- The last step of the form includes a Submit button to complete the process. This button is only active when all required fields are validated.
- Progress Indicators (Optional)
- To enhance user experience, you can include a progress bar or step indicator at the top of the form. This visually shows users where they are in the process.
Why Multi-Step Forms are Important ?

Multi-step forms split a single, long form into smaller, more manageable sections. This approach offers several advantages.
- Improved User Experience
- Multi-step forms streamline the data collection process by grouping related fields together, making sure users can focus on one task at a time.
- Increased Completion Rates
- By presenting fewer fields per step, users are less likely to abandon the form midway.
- Better Organization
- Multi-step forms allow logical grouping of fields, improving clarity and data accuracy.
How to Build Multi-Step Forms
Building multi-step forms is a straightforward process that involves structuring your form in HTML, styling it with CSS, and adding interactivity with JavaScript. These forms break down extensive information into smaller steps, making them more user-friendly and less daunting for users. Following through the steps below will help you gain a better idea on how to construct these forms using HTML, CSS and Javascript.
1. Create the HTML Structure
To start, create a multi-step form layout in HTML. Each step of the form will be wrapped in a container that can be hidden or shown dynamically. Refer to the following code for additional help.
<!DOCTYPE html>
<html lang="en">
<head>
    <meta charset="UTF-8">
    <meta name="viewport" content="width=device-width, initial-scale=1.0">
    <link rel="stylesheet" href="styles.css">
    <title>Multi-Step Form</title>
</head>
<body>
    <div class="form-container">
        <form id="multiStepForm">
          <div class="step-content active" data-step="1">
            <h2>Personal Information</h2>
            <div class="form-group">
              <label for="name">Full Name</label>
              <input type="text" id="name" required>
            </div>
            <div class="form-group">
              <label for="email">Email</label>
              <input type="email" id="email" required>
            </div>
          </div>

          <div class="step-content" data-step="2">
            <h2>Contact Details</h2>
            <div class="form-group">
              <label for="phone">Phone Number</label>
              <input type="tel" id="phone" required>
            </div>
            <div class="form-group">
              <label for="address">Address</label>
              <textarea id="address" required></textarea>
            </div>
          </div>

          <div class="step-content" data-step="3">
            <h2>Review</h2>
            <div class="form-group">
              <label for="comments">Additional Comments</label>
              <textarea id="comments"></textarea>
            </div>
          </div>

          <div class="buttons">
            <button type="button" id="prevBtn" class="btn" disabled>Previous</button>
            <button type="button" id="nextBtn" class="btn">Next</button>
            <button type="submit" id="submitBtn" class="btn submit" style="display: none;">Submit</button>
          </div>
        </form>
      </div>
      <script src="script.js"></script>
</body>
</html>
At this point, you should be able to get the following result.

2. Style the Form With CSS
Now that we’ve completed the HTML structure, it’s time to focus on styling the form to make it visually appealing and user-friendly. By applying CSS, we can make sure that inactive steps remain hidden, buttons are styled elegantly, and the overall design looks polished and professional. The following CSS will help achieve these goals.
:root {
    font-family: Inter, system-ui, Avenir, Helvetica, Arial, sans-serif;
    line-height: 1.5;
    font-weight: 400;
    color-scheme: light dark;
    background-color: #f5f5f5;
  }

  body {
    margin: 0;
    display: flex;
    place-items: center;
    min-width: 320px;
    min-height: 100vh;
  }

  .form-container {
    background: white;
    padding: 2rem;
    border-radius: 8px;
    box-shadow: 0 2px 10px rgba(0, 0, 0, 0.1);
    width: 100%;
    max-width: 600px;
    margin: 0 auto;
  }

  .step-content {
    display: none;
  }

  .step-content.active {
    display: block;
  }

  .form-group {
    margin-bottom: 1.5rem;
  }

  label {
    display: block;
    margin-bottom: 0.5rem;
    font-weight: 500;
  }

  input, textarea {
    width: 100%;
    padding: 0.5rem;
    border: 1px solid #ddd;
    border-radius: 4px;
    font-size: 1rem;
  }

  textarea {
    min-height: 100px;
    resize: vertical;
  }

  .buttons {
    display: flex;
    gap: 1rem;
    margin-top: 2rem;
  }

  .btn {
    padding: 0.6em 1.2em;
    font-size: 1em;
    font-weight: 500;
    border-radius: 8px;
    border: 1px solid transparent;
    background-color: #1a1a1a;
    color: white;
    cursor: pointer;
    transition: all 0.25s;
  }

  .btn:disabled {
    opacity: 0.5;
    cursor: not-allowed;
  }

  .btn:not(:disabled):hover {
    background-color: #2a2a2a;
  }

  .submit {
    background-color: #646cff;
  }

  .submit:hover {
    background-color: #747bff;
  }

  @media (prefers-color-scheme: light) {
    .btn {
      background-color: #f9f9f9;
      color: #213547;
      border: 1px solid #ddd;
    }

    .btn:not(:disabled):hover {
      background-color: #eaeaea;
    }

    .submit {
      background-color: #646cff;
      color: white;
      border: none;
    }

    .submit:hover {
      background-color: #747bff;
    }
  }
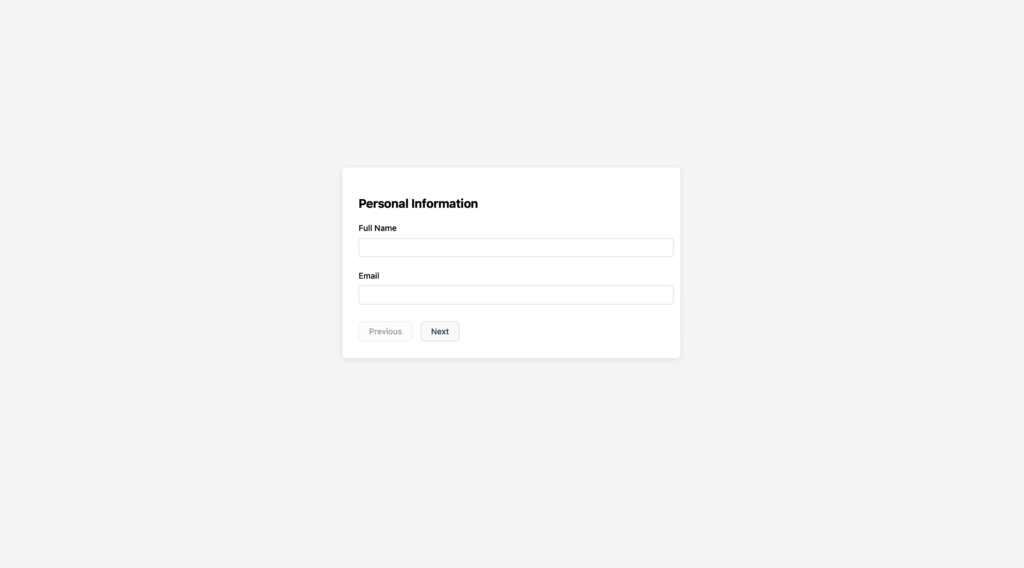
At this point, you should be able to get the following result.

3. Add JavaScript for Interactivity
To manage step navigation and validations, we’ll use Vanilla JavaScript. Refer to the following code for additional help.
let currentStep = 1;
const form = document.getElementById('multiStepForm');
const prevBtn = document.getElementById('prevBtn');
const nextBtn = document.getElementById('nextBtn');
const submitBtn = document.getElementById('submitBtn');
const steps = document.querySelectorAll('.step');
const stepContents = document.querySelectorAll('.step-content');

function updateStep(stepNumber) {

  // Show/hide step content
  stepContents.forEach(content => {
    content.classList.remove('active');
    if (parseInt(content.dataset.step) === stepNumber) {
      content.classList.add('active');
    }
  });

  // Update buttons
  prevBtn.disabled = stepNumber === 1;
  nextBtn.style.display = stepNumber === 3 ? 'none' : 'block';
  submitBtn.style.display = stepNumber === 3 ? 'block' : 'none';
}

nextBtn.addEventListener('click', () => {
  if (currentStep < 3) {
    currentStep++;
    updateStep(currentStep);
  }
});

prevBtn.addEventListener('click', () => {
  if (currentStep > 1) {
    currentStep--;
    updateStep(currentStep);
  }
});

form.addEventListener('submit', (e) => {
  e.preventDefault();
  alert('Form submitted successfully!');
  window.location.reload();
});
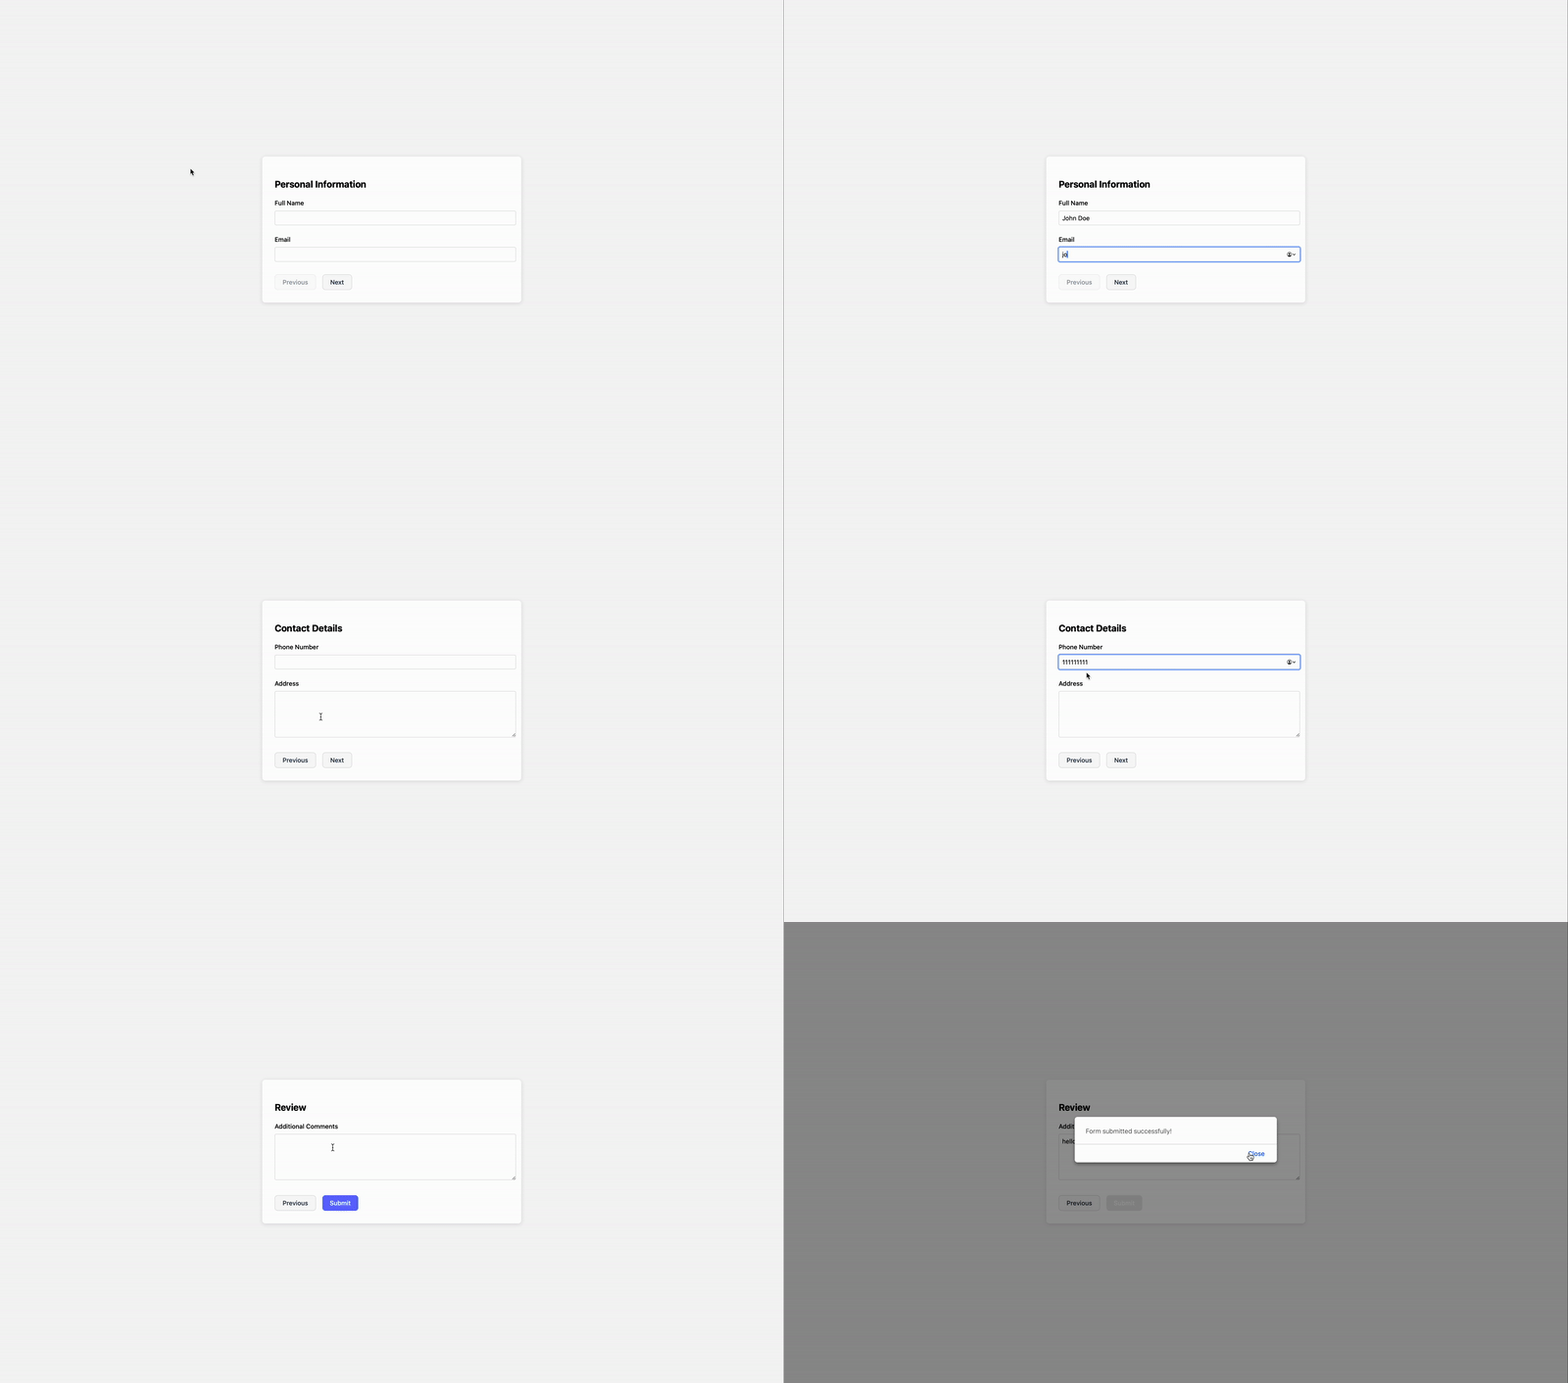
At this stage, you should be able to achieve the following result. Your form should now function smoothly and deliver the desired user experience.

4. Enhance the User Experience
You don’t have to stop here. User experience is important when it comes to forms. Let’s explore how we can further enhance the experience and add additional features that will make the form more intuitive and engaging for users.
You can further improve the multi-step form by adding the following.
- Progress Indicators
- Use a progress bar or breadcrumbs to show users where they are in the process.
- Animations
- CSS transitions or JavaScript-based animations can make step changes smoother.
Update your HTML by including the following progress bar code under the form-container section.
<div class="progress-bar">
    <div class="step active">1</div>
    <div class="step">2</div>
    <div class="step">3</div>
  </div>
To enhance the visual appeal of the progress bar, apply the following CSS styles.
.progress-bar {
    display: flex;
    justify-content: space-between;
    margin-bottom: 2rem;
    position: relative;
  }

  .progress-bar::before {
    content: '';
    position: absolute;
    top: 50%;
    left: 0;
    right: 0;
    height: 2px;
    background: #e0e0e0;
    transform: translateY(-50%);
    z-index: 1;
  }

  .step {
    width: 30px;
    height: 30px;
    border-radius: 50%;
    background: #e0e0e0;
    display: flex;
    align-items: center;
    justify-content: center;
    font-weight: bold;
    position: relative;
    z-index: 2;
  }

  .step.active {
    background: #646cff;
    color: white;
  }
Dynamically update the progress bar using JavaScript within the updateStep function.
steps.forEach((step, index) => {
    if (index + 1 <= stepNumber) {
      step.classList.add('active');
    } else {
      step.classList.remove('active');
    }
  });
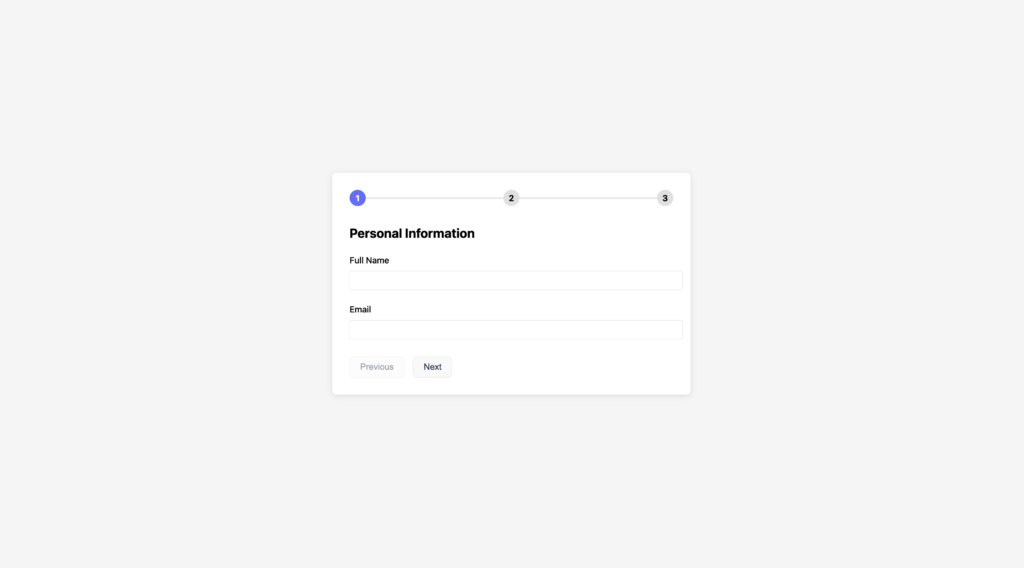
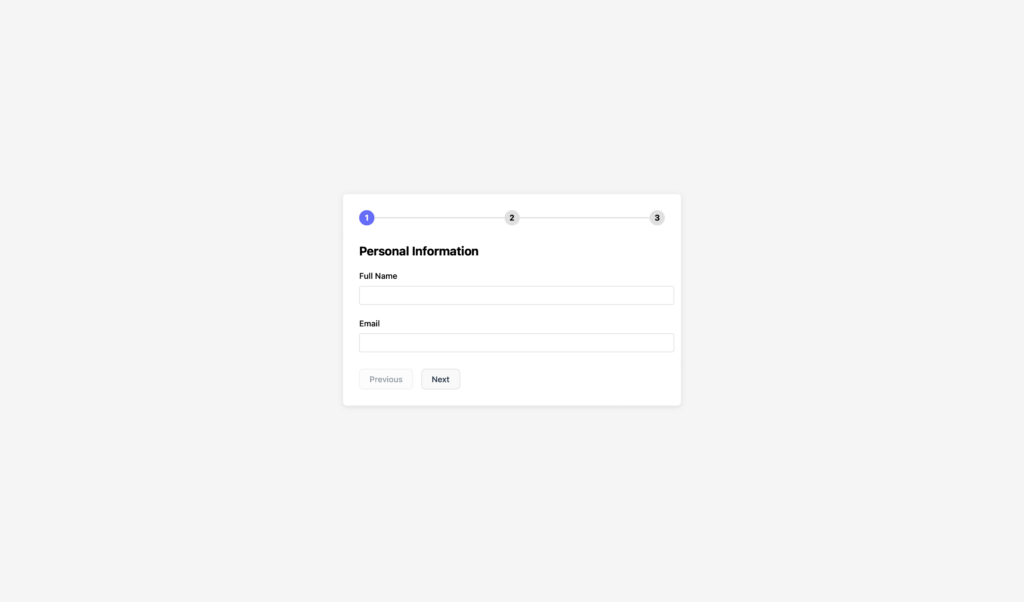
At this stage, you should be able to see the following result.

Additional Features You Can Add

Once you’ve built a basic multi-step form, you can enhance its functionality and user experience by incorporating additional features. These features not only make the form more engaging but also make sure it caters to a broader range of use cases and user preferences. Following are some additional ideas you can consider adding to your form.
- Form Field Validations
- Adding real-time validations helps users identify and fix errors immediately, improving the overall form experience.
- Save and Resume Later
- For lengthy multi-step forms, allowing users to save their progress and resume later can significantly enhance usability. This feature is especially useful for forms like applications or surveys.
- Conditional Logic
- Conditional logic enables dynamic form fields based on user input. For example, if a user selects “Yes” for a specific question, an additional set of fields appears.
- Keyboard Navigation
- Enhancing navigation with keyboard shortcuts improves accessibility of the form.
- Auto-Saving Form Data
- Prevent users from losing their progress due to browser crashes or accidental navigation by auto-saving form data.
- Custom Animations
- Adding animations between steps creates a smoother transition and keeps users engaged. You can use CSS animations or JavaScript libraries for more advanced effects.
- Multi-Language Support
- For global audiences, offer a multi-language form where users can select their preferred language. Use a language dropdown and dynamically load text for labels and placeholders.
Conclusion
Multi-step forms are an essential tool for improving user experience when collecting extensive information. By dividing a form into smaller, manageable steps, you can make the process less intimidating and more engaging for users. In this guide, we’ve covered everything from structuring and styling forms in HTML and CSS to adding functionality with Vanilla JavaScript.
We also explored ways to enhance your forms with features like progress indicators, real-time validations, conditional logic, and auto-save capabilities. These additions not only make your forms more functional but also make sure that users have a seamless experience. Whether you’re building a registration form, a survey, or a checkout process, implementing multi-step forms is a smart choice for creating efficient and user-friendly interfaces.
FAQs
What are the benefits of multi-step forms?
- Multi-step forms improve user experience by reducing form fatigue, organizing data collection, and increasing completion rates.
Can I use multi-step forms for dynamic data collection?
- Yes! Combine multi-step forms with AJAX or Fetch API to collect and process data dynamically without refreshing the page.
Can I use multi-step forms without JavaScript?
- Yes, but functionality will be limited. Without JavaScript, you can create a series of linked forms using the
<form>element and navigation buttons. However, dynamic features like progress indicators and real-time validation won’t be possible without JavaScript.
Are multi-step forms good for all types of applications?
- No, multi-step forms are ideal for processes requiring extensive information, such as registrations, surveys, or checkout processes. For simpler tasks with only a few fields, a single-step form is often more efficient and user-friendly.
How do I handle errors during form submission?
- If there’s an error during submission (e.g., server issues or invalid data), notify the user with a clear error message. Highlight the problematic fields and, if possible, direct the user back to the relevant step for corrections.


